Tomatoes and Cucumbers


My husband is a veggie head. That's not to say that he loves to eat vegetables. Really, he just loves to grow them. And I gotta say, he's good at it. The above photo is only a small picking from last year's harvest.  Problem is, though they produce a lot of goodies, his gardens themselves aren't pretty to look at, and we have many love spats about this each year. Crooked, makeshift fences, erratic "latices" of string, overgrown borders of weeds... seriously.  Of course, the ONLY place he says the sun is "just right" for his ugly garden is in the middle of my back yard - the direct focal point of my outdoor and indoor living space (from all living and dining room windows).

Now, I love that Josh is the kinda man that doesn't understand what makes something pretty. But c'mon! See what I mean? This is last year: (don't miss the beer bottle in the pot)


Alas! Josh has finally succumbed to my demands for a prettier garden. I told him I will not eat a single tomato until he builds me a pretty garden to look at. And the boy loves to feed me. So look what he did. I'm so proud!


And look at these cool tomato cages he built out of the left over wire fencing. Grow, babies, grow!


We joke that now that the garden is pretty, nothing will grow. I'm hoping this isn't true. I'll keep you abreast on the progress. And those of you who know me will hopefully be nourished from the bounty soon!


A definite maybe


Just ran across this photo on Design Sponge. You know what I'm thinking don't you? These gorgeous wall panels may be exactly what my ugly bedroom needs! What do you think? Should I fill the huge frames with a darker shade of aqua, a crisp white, or maybe a fabulous damask wallpaper... say, something like THIS:

http://designerwallcoverings.com/WallpaperStore/images/DIG40000-VictoriaDamaskBlueBrown2.gif

We'll see. First step is convincing Joshua to do it. I'll keep ya posted (pardon the pun).

Lamp Love

My friend, Karen, and I felt so sorry for this vase on the clearance rack at Stein Mart... so bad that we rescued it and turned it into a fabulous lamp!

Before:


After!


The vase was only $13, and the whole lamp ended up costing around $35! This was a fun project, and this is how you can do it...

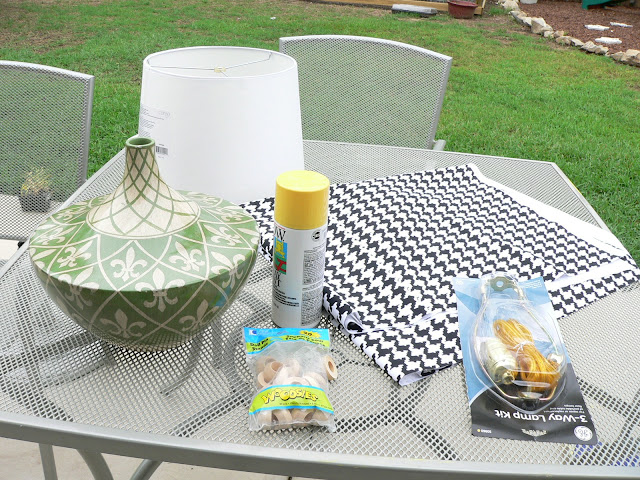
1) Gather materials (see photo below): vase, spray paint, lamp kit (bought at goodwill for $6!), fabric, ribbon, wood thingies with holes to cap off mouth of vase (got these at Joannes), drill with diamond bit (Lowes).

2) Unless your vase is wood (which would be weird) use a diamond bit to drill a hole in lower side of vase. We got ours from Lowes for $15. Diamond bits work on tile, glass, ceramic, and probably surgical steal.

3) Spray paint vase. I regretted not using a primer spray first because it took nearly 500 coats to cover the design. #1 spray painting rule: do many super-light coats to keep from dripping. It's tedious but worth it. Grab a margarita and make an evening out of it.

4) Cover lamp shade with fabric and grosgrain ribbon to trim. We bought a self-stick shade from Joannes. They are cheap (this one was $8) and super easy to stick fabric or paper to. You could also use spray adhesive on a regular shade.

5) Assemble lamp kit parts. You can easily find lamp kits and parts at home improvement stores. We stopped by Goodwill to look for cheap lamps to disembody and use parts from (they have like $3 lamps that are great for this), but they just happened to have an unopened lamp kit for $6. That's just crazy luck. We added the wooden piece (available at craft stores - anything with a hole will work) to the assembly to act as a cap on the mouth of the vase (see picture of assembly below).

6) Glue the wooden piece to the mouth of the vase and install shade. I used Liquid Nails from Lowes.

7) Turn that baby on and do a super cool victory dance.


This is Joshua's 'oh man I hope I don't break this thing' look: 


The very sad ending to this story is that I built this for Karen's master bedroom that I am helping her revive. I am heartbroken to deliver it to her tomorrow because it looks so happy in my nook. But I know it is best, for it will be even happier in her newly fabulous boudoir. I'll be posting about that project soon. At least I'll always have the memories...

Tiny house. Tiny budget. Great memories.

Ok, this is ridiculous. My desktop is so full of miscellaneous files and photos that my pretty zen garden wallpaper is almost completely covered. That's not very feng shui. So I vowed to clean this shit up while Josh watches some boring documentary on Jesse James.

But I'm already distracted.

I ran across some pics of the cute little cottage we owned before our current home, and I had to share. I adored this home. I remember WAY back when Josh and I were in our late teens, driving around for no reason at all other than having nothing better to do (miss those days), we would drive by this house all the time. Every time I saw it I'd say, "one day I want to live in that house." A serendipitous 8 years later, we were signing the papers. 

We had like no money. And the house was so freaking small, less than 1000 sq ft, which drove me insane at times. But it was much loved. Oh the time and creative energy we burned within that half an acre. And oh yeah, we brought home our first baby there too.


Painted every possible surface, including the cabinets; tiled the floor; installed wainscoting (that was a crazy week)...


More wainscoting...


Panel trim around tv; painted everything. First major purchase of my adulthood: that rug.


Our cute little office. I painted that old upholstered chair, fabric and all. That's an Oma pillow. I miss her.


Damn cute bathroom!


And Rosa Leigh's first bedroom. Awe! I'm still so proud of that side-table makeover. And the wall shelf makeover. And the dresser makeover. Man I was a busy pregnant lady!


Wish I could find a summer picture. We built those cedar shutters. It's hard to tell from the picture, but they have cute star cut-outs.  

And here is a painting I did of the house for Rosa Leigh. I hope she keeps it forever.

Prom Queen

I was eating my lunch in the break room the other day and overheard a coworker describing her daughter's prom dress. It sounded pretty, but she ended the description with, "and ya know you can't get a dress under $500." I nearly choked on my tuna salad. 

I'm way too old to be going to a prom, except as a chaperon, but this outrageous statement inspired in me a little daydreaming and the urge to find a fabulous prom get-up for way under $500...

This dress SCREAMS for a bold bib necklace. That led to the Egyptian, snakey flare in the bracelet and shoes.

Dress: Modcloth.com $198
Shoes: Endless.com $65
Necklace: Ebay $15
Clutch: Endless.com $35
Bracelet: Forever 21 $6

Total: $319!

And I couldn't resist posting this Betsey Johnson dress from Modcloth. It's kinda pricey at $398, but you wouldn't need many accessories with this one. Just a pair of hot pink satin pumps and a hot pink wrist corsage. Fun fun fun!


Swooning for you


My first look at Gucci's AMAZING new spring line was on the back of Katy Perry via my Elle Magazine cover last month. The moment I laid eyes on those incredible jewel toned silks and gold tassels I was in loooove.

It is sadly unfortunate, however, that you will not find me on fifth avenue picking up this ensemble any time soon.  So I've been looking for some more accessible (and probably wearable) looks. And for those of you who are now swooning over anything color-block, thanks to Gucci, here are a few of my finds.


Top: Gap ($50)
Pants: Talbots ($70)
Belt: Michael Kors from Bluefly.com ($23)


Now this dress from Target ($28) isn't that great, but imagine it cinched at the waist with this fabulous belt from Asos.com ($22)

And check out this great video from stylist.com on how to wear the color blocking trend. 

Now I just need to find a royal purple blazer to go with that first outfit. *yawn* I'll look tomorrow. Goodnight!

Screw it!


Sometimes I just sit in my bedroom and stare at the walls wondering…

What the HELL was I thinking?

I’ve been obsessing over this room and how to FIX it for 2 months now. I’m about ready to drown my frustrations in vodka martinis and Lays potato chips, which is never a good thing. So before I drive myself absolutely insane over this, I have decided to for-get-IT! At least for now.

This weekend I intend to head back over to Rosa Leigh’s room for some fun finishing touches to her walls. 2 reasons:

1: Thanks to Uncle Sam, this month's budget is busted. So I need to do something free.
2: I love working in this room… it makes me feel like a little girl again. Pink and Aqua make great medicine!

So here is what we have so far:


And here is what I’m planning:
-Finish her photo board (ran out of ribbon)
-Paint a cute frame on the wall around it
-Paint the bookshelf from the playroom and move it in (I think)
-Hang pictures with maybe some cute mural above the bookshelf.

You will see a post of the results next week. God willing.

Goody: Happy Chic!


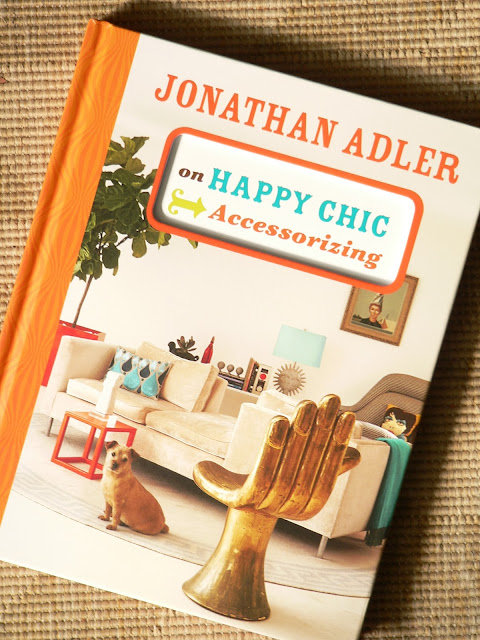
I got my new Jonathan Adler book in from Amazon today. Woo hoo! This is the second of his "Happy Chic" books that I have, and I can't wait to dive in. I'm going to try my best to not even crack it until Rosa goes to bed on Friday night, and the house is quiet, and I have a fresh martini in hand. Mmmm. These are the little things that get me through the week.

I wonder what Jonathan would say about my master bedroom redo gone wrong. Ugh. I'm mortified at the thought.

Latest Painting: Hello Yellow


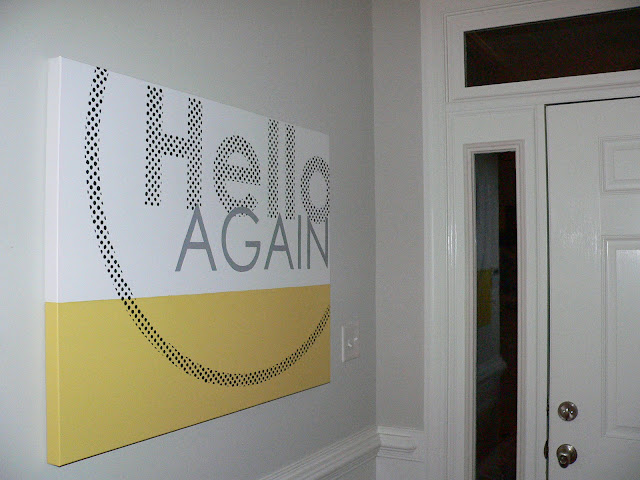
My latest painting was for my entryway. I wanted something super clean and graphic and, well, welcoming. So this is what I ended up with. I wasn't sure if my average visitor would like it, but this painting has gotten much love thus far. So I thought I'd post it for those of you who haven't visited lately.
I got the idea from a split-second glimpse of a Chanel logo I saw in the background of some video I saw while mindlessly surfing the Internet. I wish I could tell you where to find that, but I've since searched EVERYWHERE for it to no avail. I might have actually dreamed it. Who knows. The logo was encircled with a band of black dots, and that was the seed for this idea. But the thought of free-handing all those dots made me wanna forget the whole thing and take a nap instead, so I started by designing the layout on my computer using Illustrator... here is digital the image:


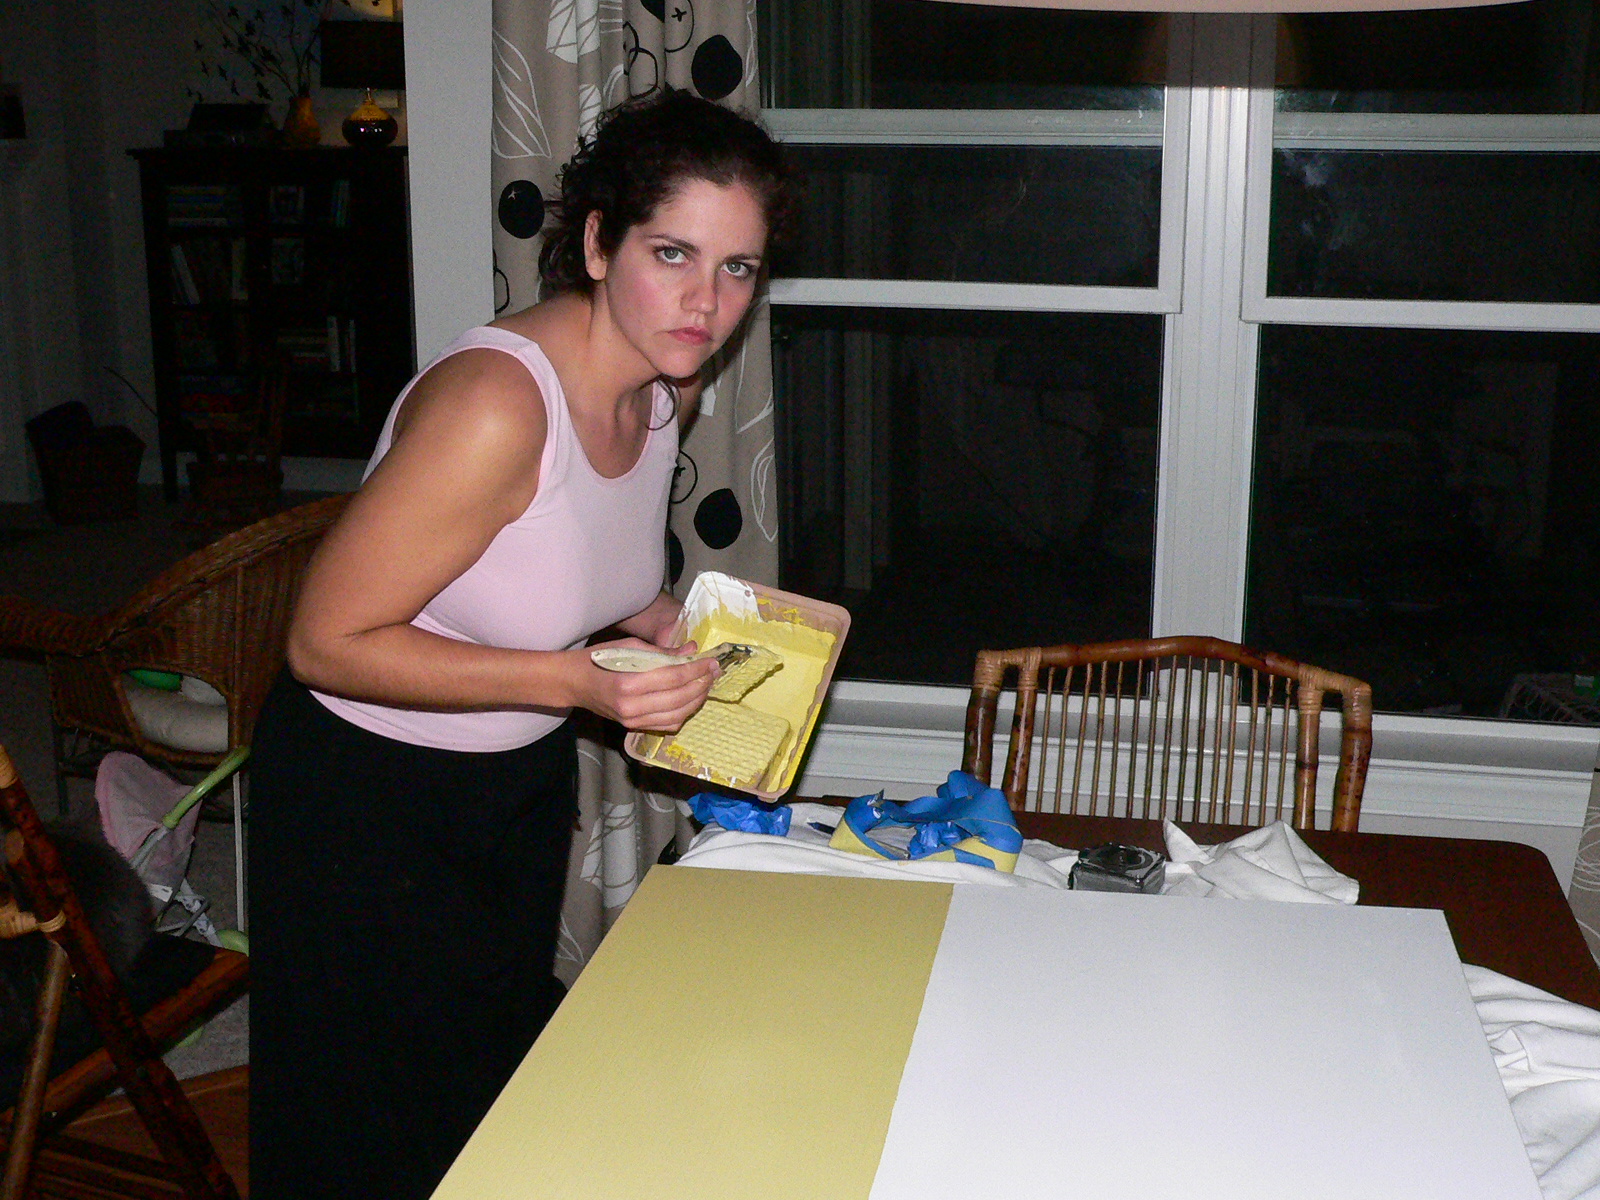
I borrowed an old-school projector from our tech dept at work for a weekend. I've always heard of crafty girls using these things for DIY murals, so I thought I'd give it a try. After painting the yellow block onto my giant canvas, I projected the image from my computer onto it and started tracing the dots with a pencil. It took me about two and a half vodka martinis to finish. And that's why the rightmost dots are a little wonky. But who cares.


Then, using a black Sharpie oil paint pen (available at most art supply stores and on Amazon) I filled the dots in. That was on night two. I had to be sober for that step. Then I free-handed the rest.
This painting was surprisingly fun to create. I think the repetitive precision was somewhat therapeutic for me at a time when my world had gotten pretty inexact.  It was definitely a huge leap from the painting I did just before that, which you can see on the opposite wall here. By the way, imagine "Hello" sunken in a nice glossy white frame. If you like that idea, please send cash.


A goody


I Had to grab a few things at Sephora today, and I picked up something I can't live without. I used to forgo eyeshadow because my lids are on the oily side, and within hours the stuff would slide right off. I also love wearing lots of seriously black eyeliner (probably too much), and I used to have to touch it up all the time. Otherwise it would form black blobs in the corners of my eyes and leave semicircular frowns on my eyelids. Not pretty. That is until I discovered this stuff. It's one of my two MUST HAVES for every day (the other being mascara).

It's called Shadow Primer Potion, by Urban Decay, and you have to forgive the cheesy packaging. It's around $18 a tube, but the last time I bought it was in December, so it lasts me about 4 months. And I seriously use it every day. Just put a thin swipe of this on each lid before applying your eye makeup, and voila! Anything you put on your eyes sticks like glue and stays put until you wash it off. Trust me. This stuff holds on through my sweaty, hour-long sessions at the gym. Just don't put too much on or you won't be able to blend your colors well.

It now comes in different colors that are apparently supposed to enhance your sheer shadows, but I never tried those. I have always used the original, colorless stuff in the purple tube. Let me know if you try the other and how it goes.

I know it sound like someone's paying me to write this. I wish they would!


A Moment's Swoon

My idea of heaven involves many beautiful lamps, and I've stumbled upon it here on earth! Check out these adorable giclee print shades. These are just a few of the huge collection at Lamps Plus.


You can even design your own shade. Here is one I designed while just playing around. Isn't she a beaut!

I Heart Yellow

I am finally inspired to get off my butt and paint something. And today, that something is a chair. While sitting on the couch in my sweaty gym clothes, surfing blogs, I stumbled upon this from Nuestra Vida Dolce:

Now I know this is not everyone's cup of tea, but it couldn't be more my flavor. This yellow is haunting my dreams at the moment. My fave catalogs, mags, and blogs are flooded with saturated, lemony hues, and it's makin me happy.

So here's the plan. I have this folding black chair left over from one of my mom's events (she's an amazing floral/event designer).


The paint is chipping on it, and I'm sure she won't mind if I paint it (she won't know till it's done anyway). I'm thinking of putting it in my living room next to my antique... uh, I don't know what you call this piece, but I use it as a pseudo office desk. Then I'm going to recover the black cushion with some chic black and white fabric.

So here it is. I wasn't sure at first about the color. It's brighter than I wanted, but I think it's growing on me. And the black and white cushion was just too much. I like the plain black. I know this is a terrible photo. I'll try to take a better one and post tonight.


I have to add some glossy white knobs to the "desk," and imagine the black and white blanket I used as a rug in the picture is a faux zebra rug like this one (my next purchase). This one is from an ebay store, Shine Rugs.